GRAMM Works Humidor

IMG_8750

I’ve been through a lot of travel humidors. I mean a LOT of travel humidors. The photo is just a representation of the ones I would be willing to take with me. The rest have either ended up in the bin or have been tossed to the side where I can forget I ever had them. Finally there is a travel humidor worth writing about. The GRAMM Works humidor.

I travel frequently and like to bring my cigars with me. (You can never count on finding a good cigar shop or that the cigar shop you find has what you want to smoke.) There have always been three truly major problems for me when traveling with cigars. 1 – Not damaging the sticks while in transit. 2 – Having the proper humidity so they don’t dry out over the period of a few days. 3 – Storage size. How does GRAMM Works solve these problems? Let me fill you in.

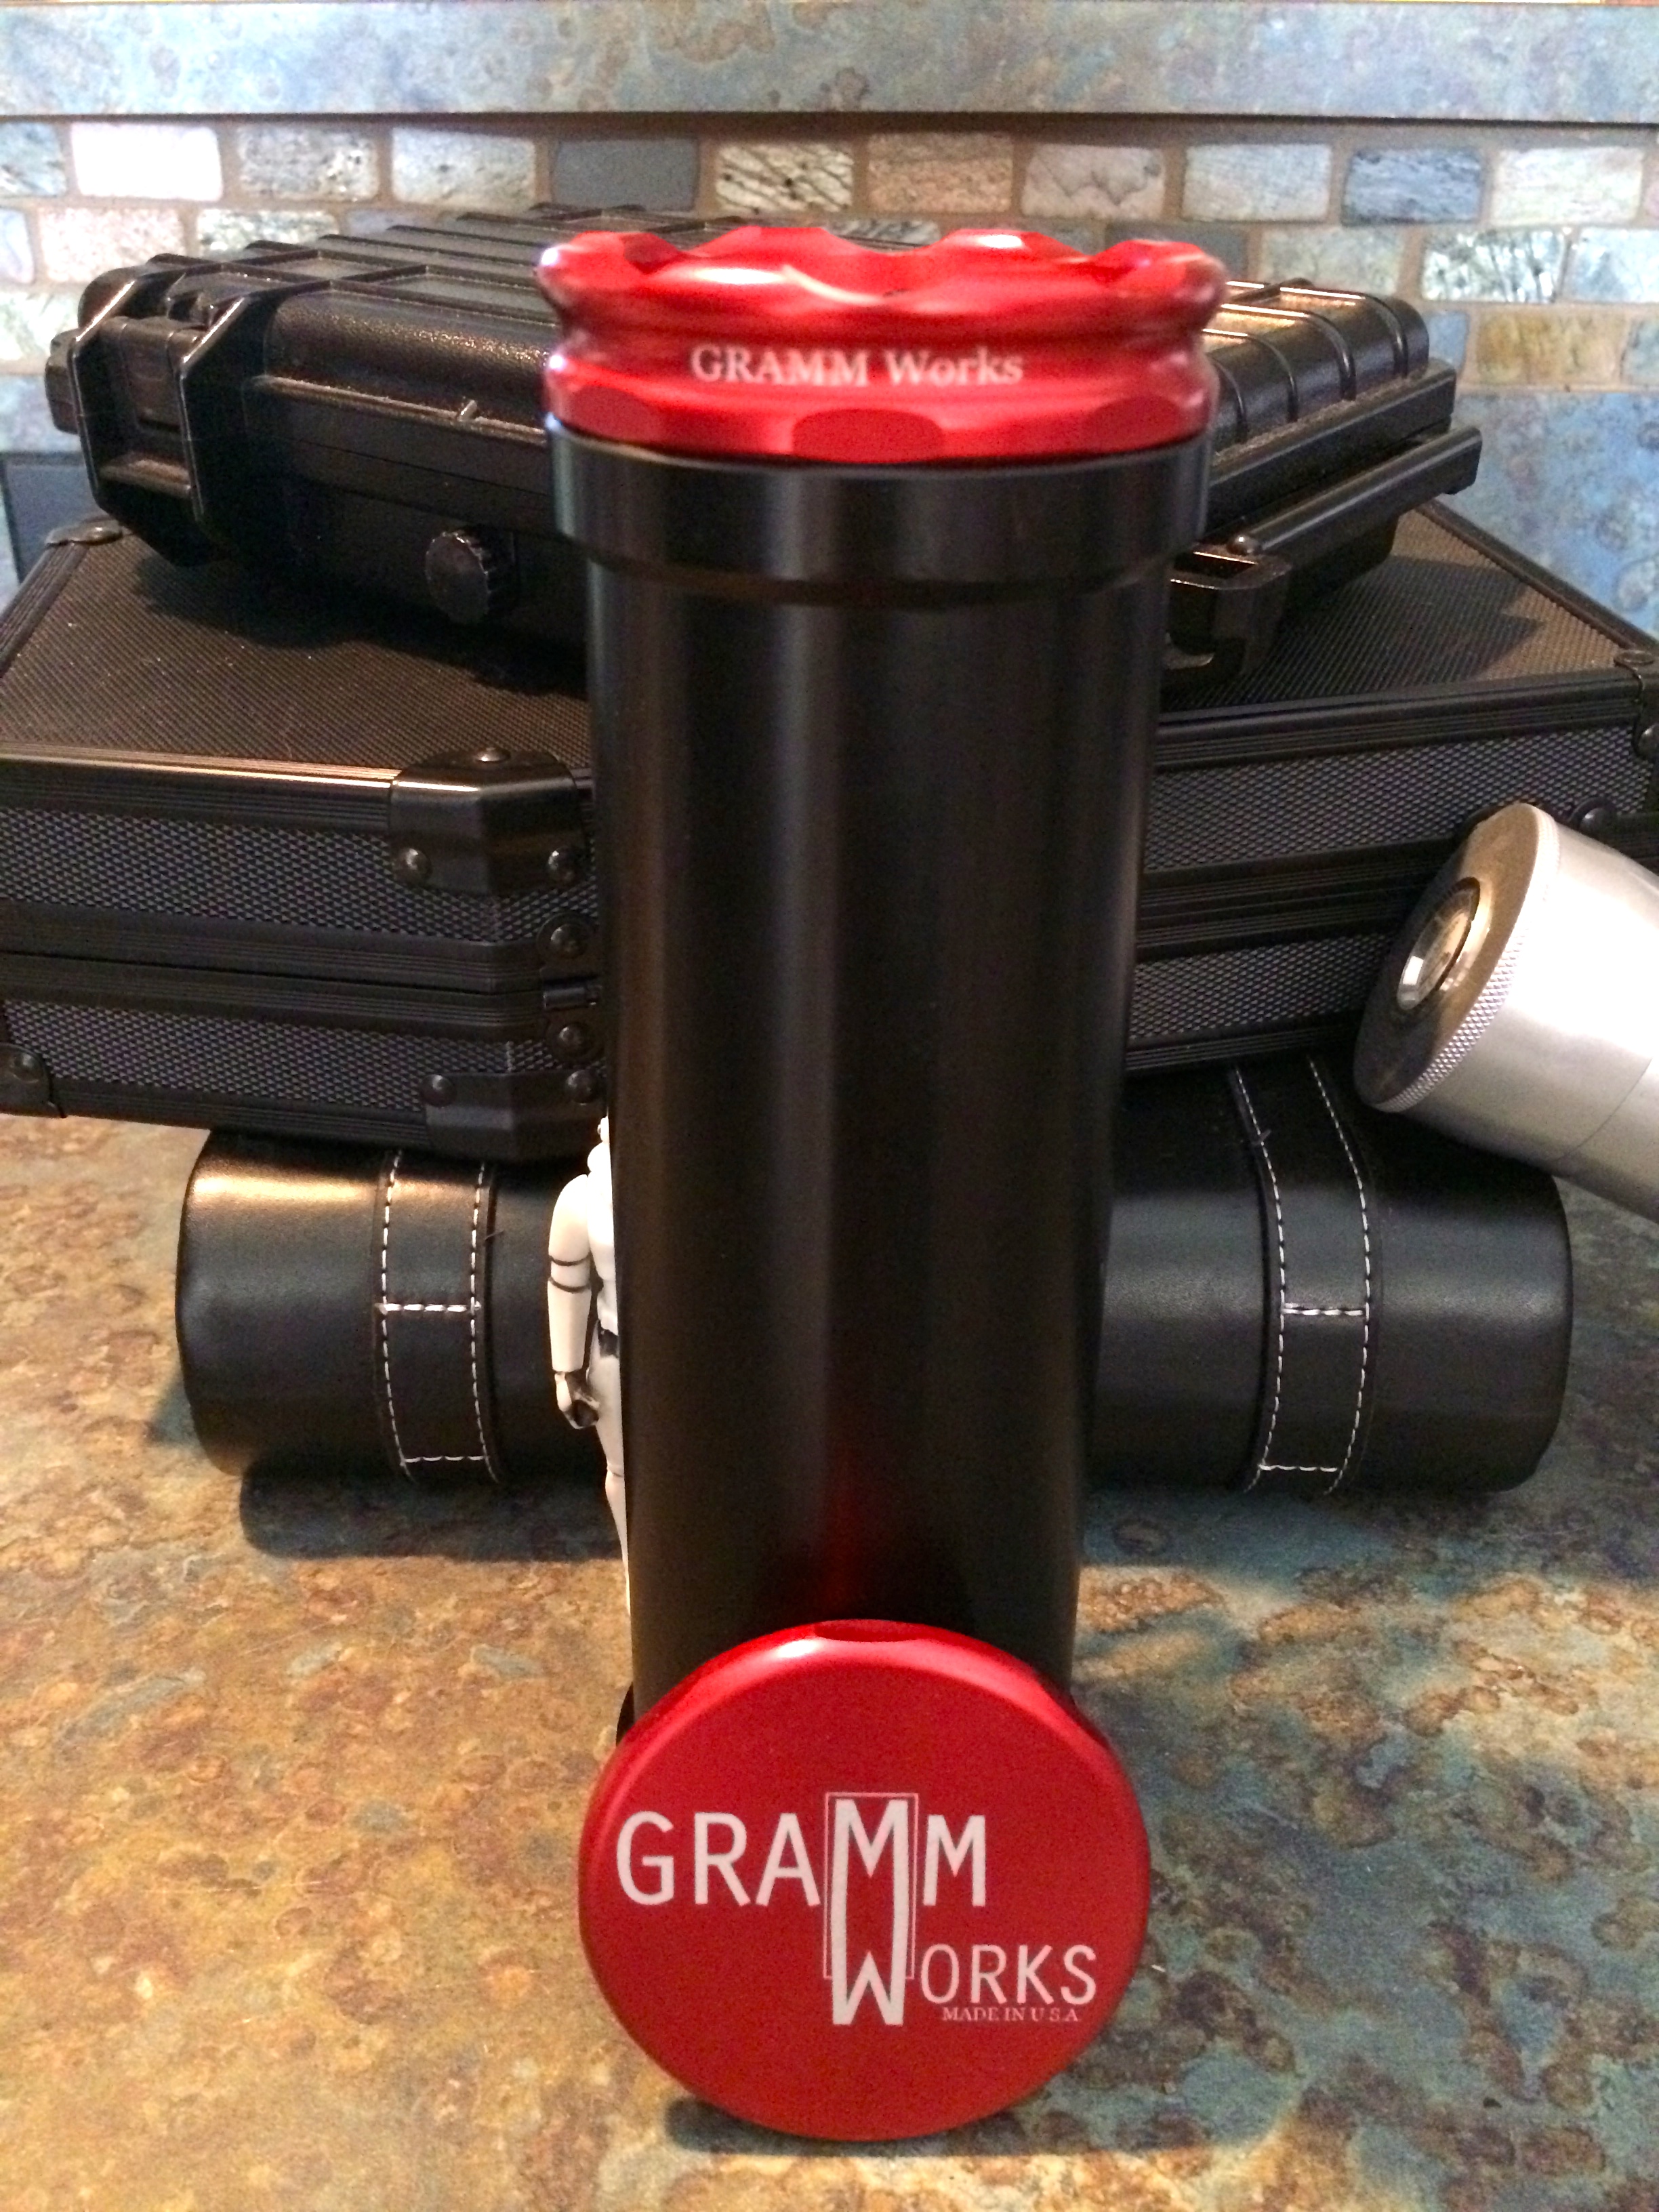
My first concern is always not damaging cigars while traveling. With a GRAMM Works you don’t have to worry about this. The tube is CNC machined from aircraft grade IMG_8637 
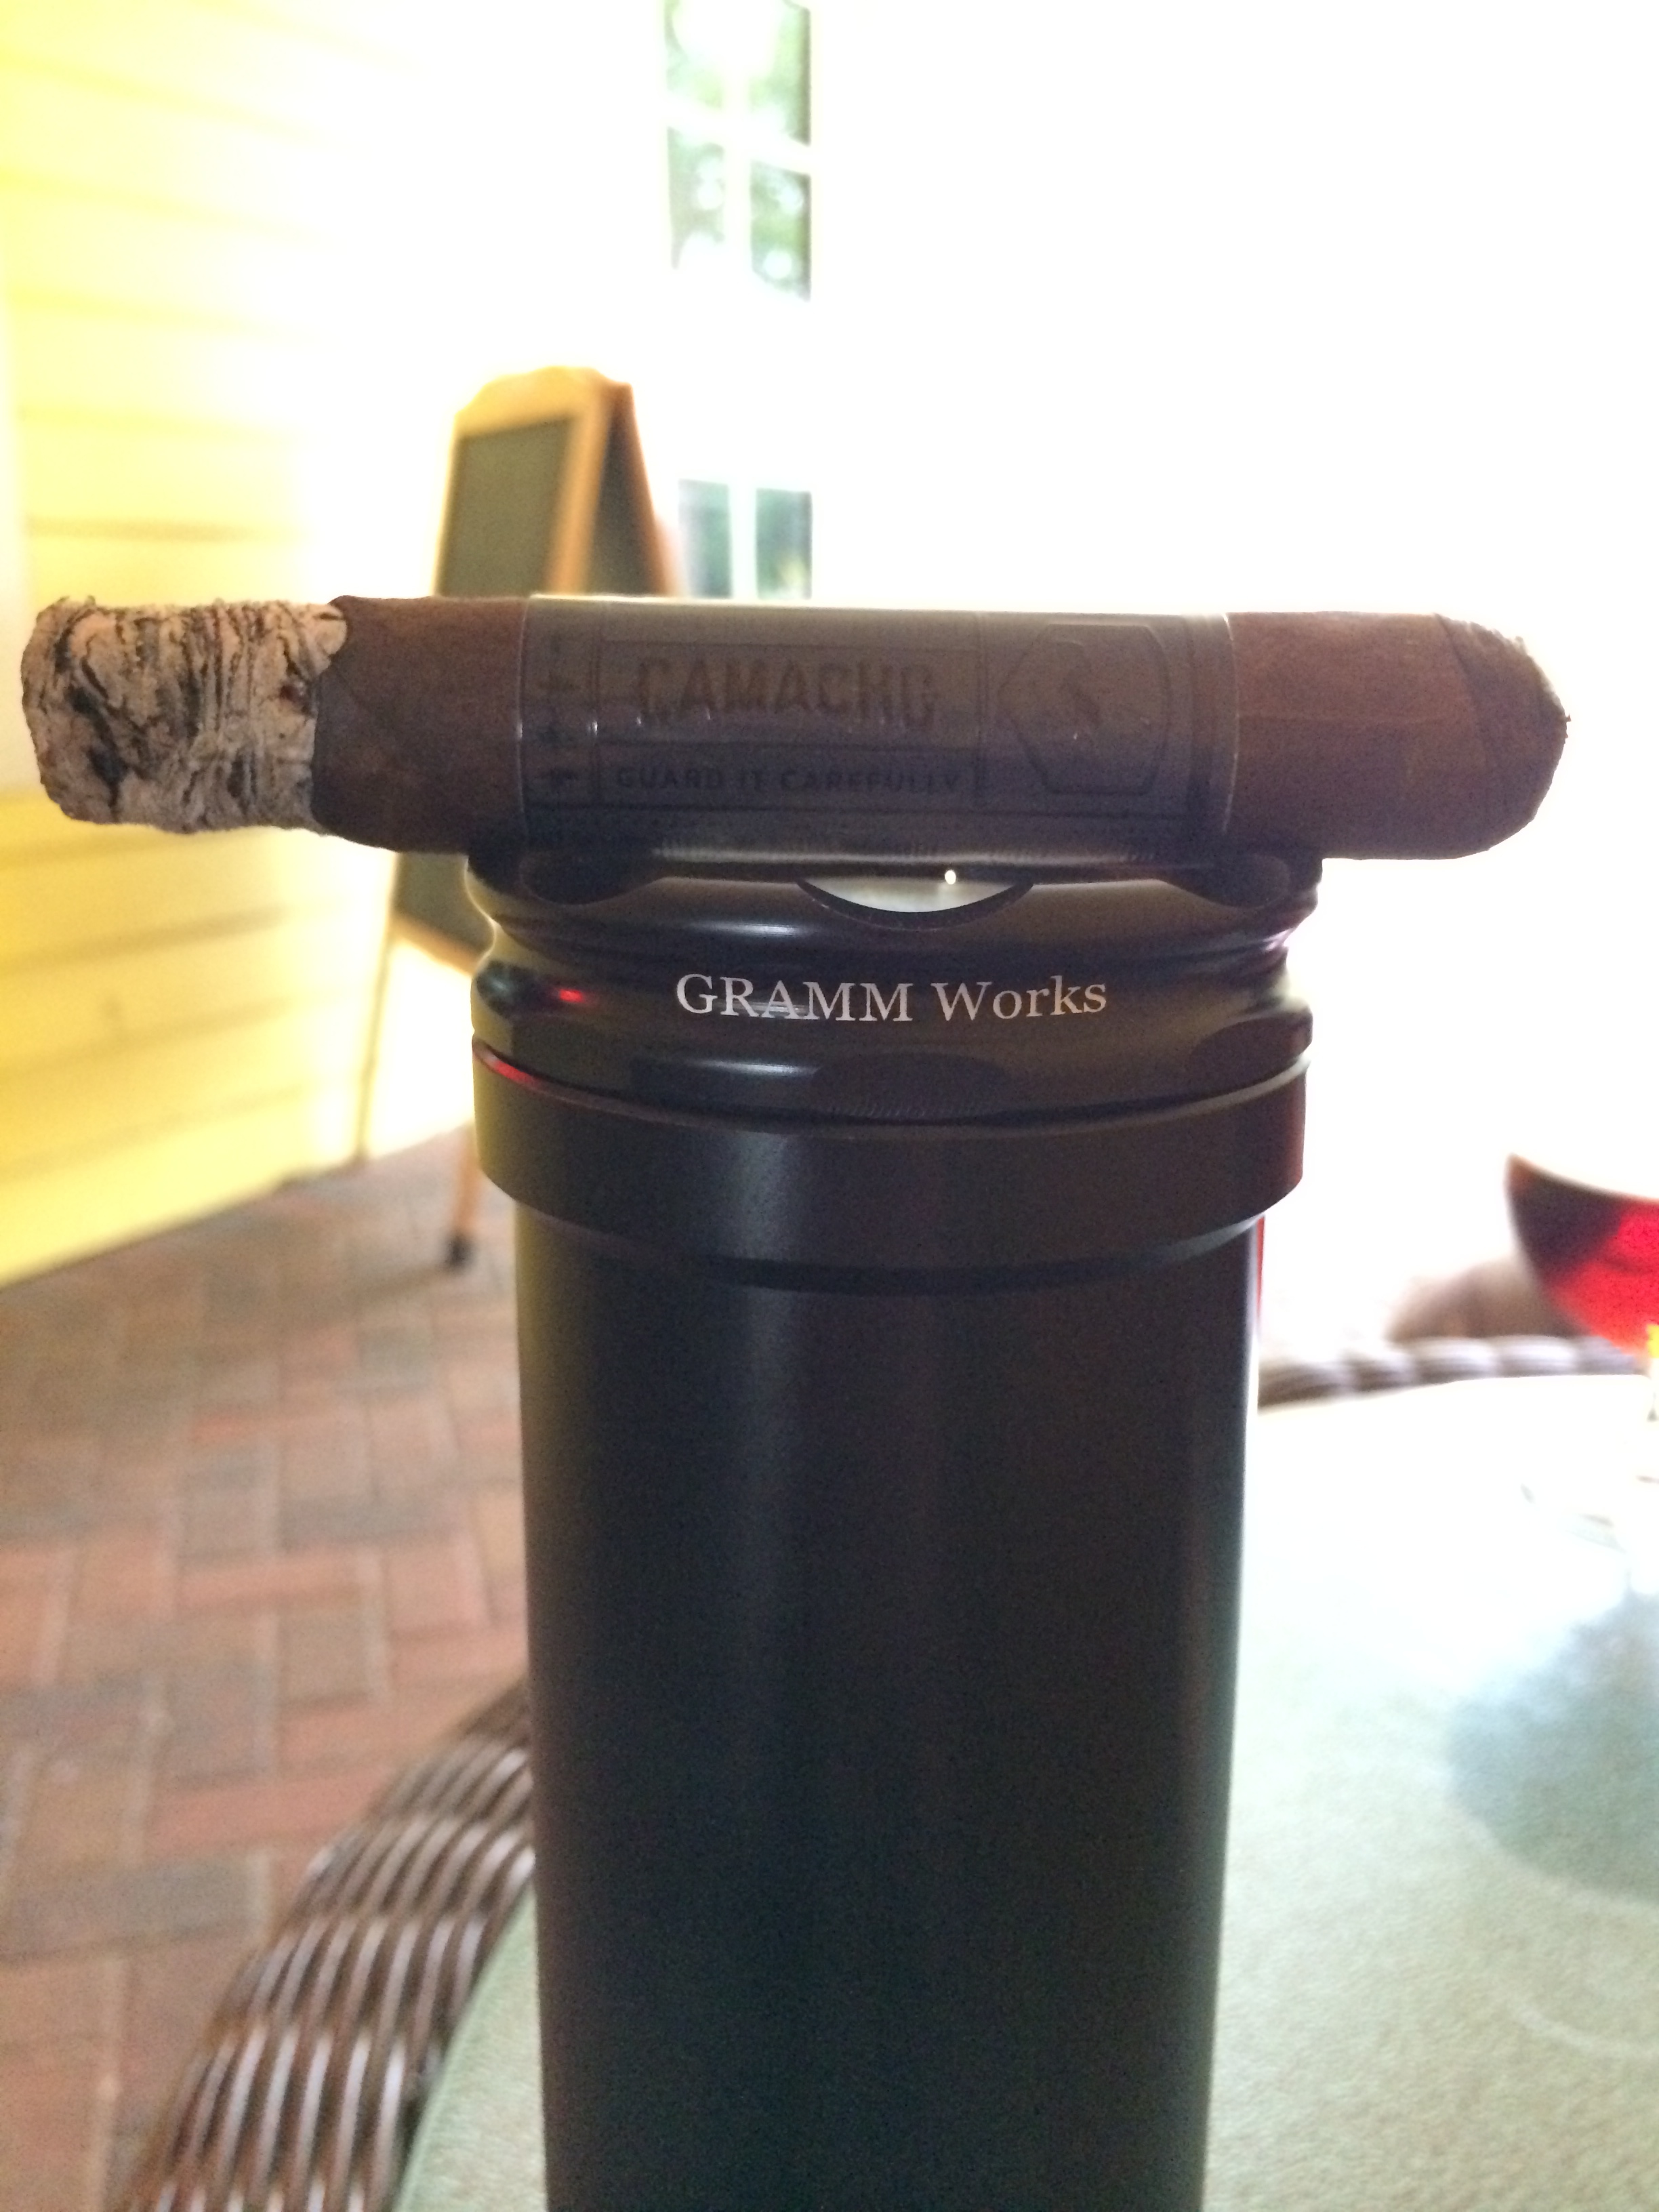
aluminum and lined with Spanish cedar. It also is anodized so you don’t have to worry about corrosion in the future. The top cap threads into the tube to ensure a good tight seal, (I mentioned this was CNC machined right) and has a built in analog hydrometer. Their “enthusiast” cap can also be used to hold your cigar while smoking. It also comes with a handy carabiner, to clip it wherever you want, that doubles as a bottle opener. These things can take a serious beating. I’ve dropped mine more times than I can count, it’s been knocked off of tables at bars, fallen down stairs, thrown around from person to person and has survived with only some surface scratches but no structural issues and my cigars were in great shape. Obviously I don’t recommend doing this what I’m trying to convey is that you don’t have to worry about your sticks getting destroyed from tossing your cigar carrier in your suitcase or backpack.

Next is the humidity. With GRAMM Works the humidity is controlled via Boveda two-way humidity packs. The bottom of the tube has a screw in insert to place the packs into so they don’t come into direct contact with the cigars them self. The packs are available in a variety of humidity percentages based off of your preference. I like the 69% for this size. With this system I haven’t had any trouble with humidity while traveling and the use of the Boveda packs makes it even easier to control.IMG_8752

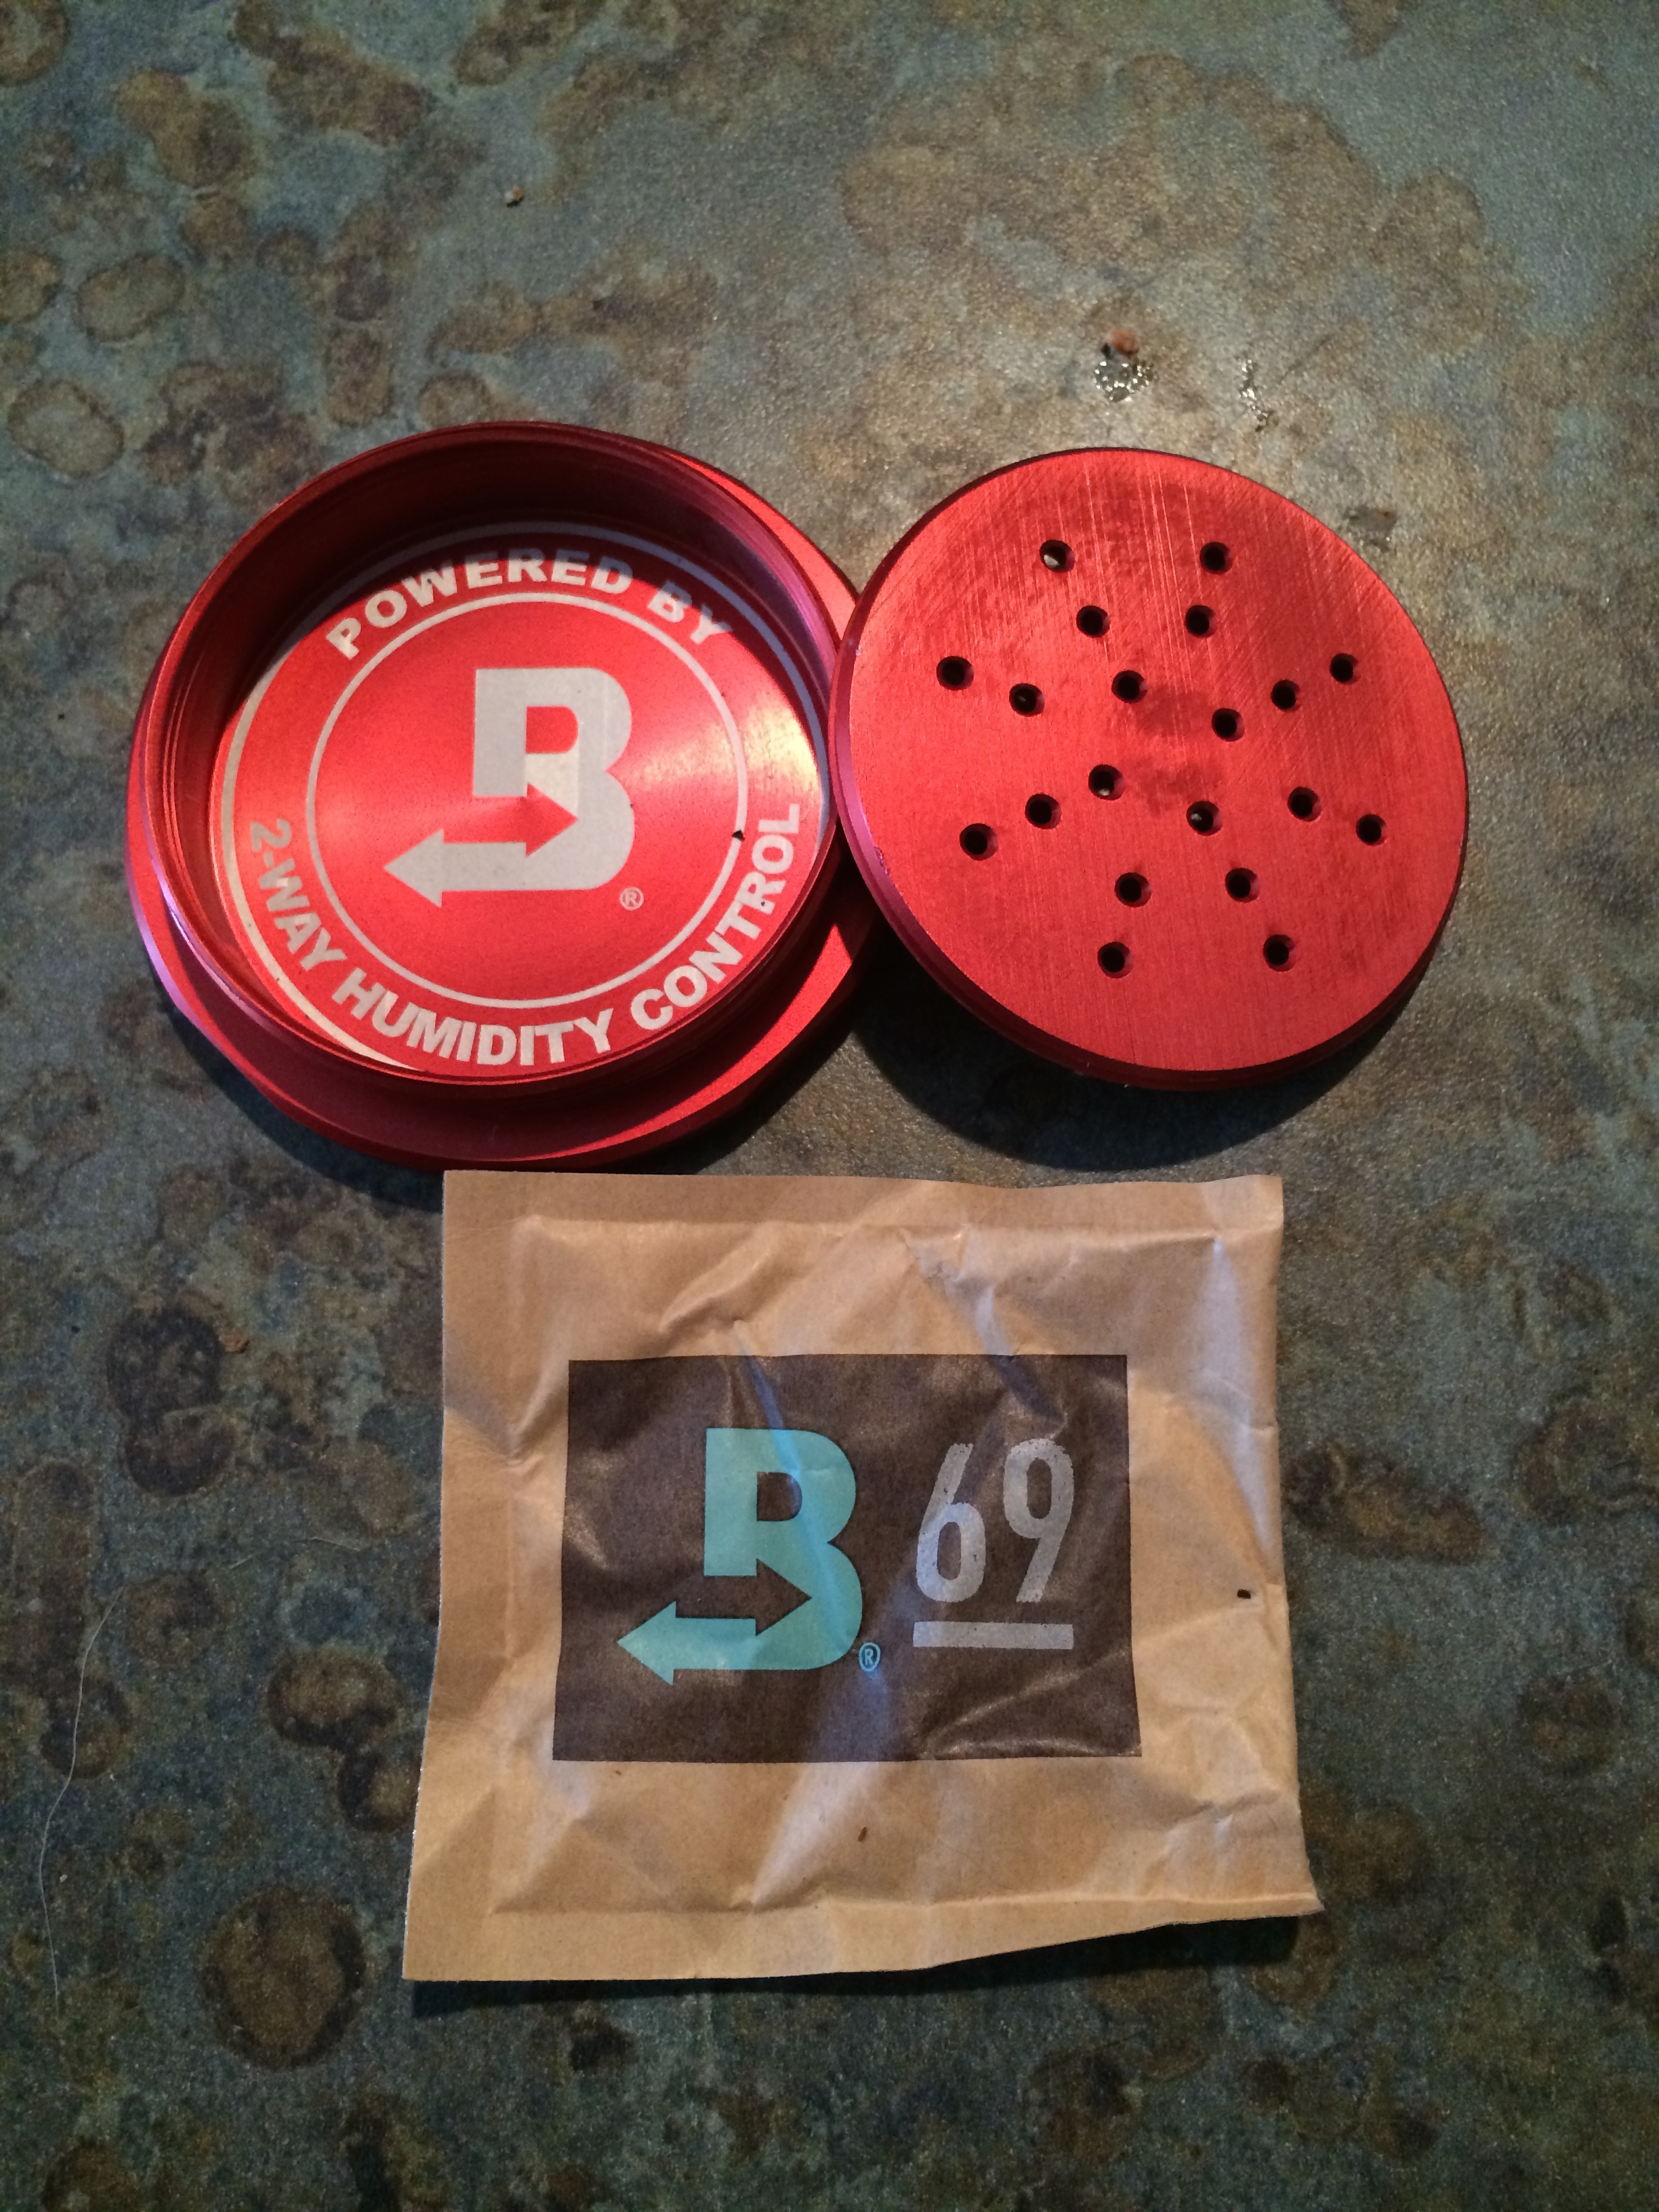
Lastly…space. Size is a real issue when it comes to traveling. You need it to be small enough to pack but big enough to carry what you want. GRAMM Works tubes are available in three sizes. 5” Robusto, 6” Toro and 7” Churchill. They make single stick tubes and multi stick tubes. Each multi tube can hold about 5 cigars with a 54 ring gauge but you could probably fit another if you tried. In the size category this is where GRAMM Works falls a little but my suggestion is if you need to carry more than five sticks, BUY ANOTHER ONE. Seriously don’t waste your money on a piece of crap just because it holds 10 sticks, get another GRAMM Works, its worth it.

If you need a great carrier that you don’t have to worry about replacing or damaging while traveling I strongly recommend the GRAMM Works humidor. The aluminum construction makes it light weight and durable, the CNC manufacturing makes everything about them incredibly consistent down to the quality of the treads and the humidity pack makes worrying about loose crystals and too much distilled water on your travel sponge a thing of the past. I have had nothing but success with their product and you will to.


Manufacturer: GRAMM Works


Website: http://grammworks.com/index.aspx


Manufactured: In PA. (That’s America by the way)


Rating: 4.9 out of 5 pints.


Wondering what CNC machining is? Click here for a video.

Armordillo Concealment’s / Boker Coye Knife Sheath

image-2So you finally got yourself one of those most Coveted Boker Production versions of the Coye Ridgeback that Bladehq.com never has in stock for more than 30 mins at a time. You wait patiently for it to arrive aka checking your tracking numbers 3 times a day. Then that day comes, you rush home to rip the box open like a kid on Christmas morning and, as you look at your new knife it all its glory, your eyes move towards the knife sheath that Boker provided and you get the WTF is going on look on your face. You pick up the sheath and start studying it saying to yourself “How the F*ck does this thing work?” after multiple attempts at properly assembling it, you finally get it together, still with the question in your mind is “Is this really how it works?” Now you try to wear your new EDC (every day carry) fixed blade knife out into the wild blue yonder, ok in reality you just wear it when you run around town doing your errands and such, while doing your daily activities you realize this knife sheath isn’t worth the plastic and hardware its made out of. Now you have reached a conundrum “what’s the point of an EDC if it isn’t comfortable to carry every day?”

image.png

The answer to that question is you need a new sheath but who makes a good comfortable sheath, Why Armadillo Concealment does! By some digging through Instagram I found out AC was in the process of making them, and were accepting pre orders. So I pre-ordered it immediately because anything could be better than the hot slice of turd Boker provided. The next day I check my email, I notice I have a confirmation email from Booth the owner of AC but I also notice I have another email from Booth, explaining that the website charged me too much for shipping, and that he would refund me the difference. A few weeks later I received my sheath in the mail, I opened up the box and to my surprise not just the new sheath but also some stickers, an AC patch and the shipping refund money exactly in cash down to the cent. Now that my friend is how you run a business, seriously how often do you see this now a day? Rarely to never is the answer to that question.

Let’s get down to Technical reasons why the AC sheath is superior to the Boker original. The size is smaller, is it hugely smaller? No, but when it comes to EDC items fractions of an inch become a mile. AC sheath trims down the size by not having excess material like the Boker sheath, Booth really trims down the kydex so it’s minimal. One of the main reasons the Boker sheath is so damn uncomfortable is the bulky belt clip that the sheath is attached to. For something that is imagesupposed to attach to your belt to make you feel it isn’t even there, it is the furthest thing from what it does. The AC, on the other hand, uses a simple yet effective soft belt loop that loops up and over the sheath being secured with “pull the dot” snaps. Those style of snaps have been used by many gun holster manufactures for a while now and work just like it says “pull the dot.” If you have had any experience with them you know they are pretty effective. I can’t say the Boker sheath has any imperfections in the finish but then again its mass manufactured in some factory somewhere across the world. The AC sheath lacks perfection but in that sense you can tell human hands have made this, and its actually made here in America by a small business and that means something to me. You can see Booth cares about every product he puts out, to the point he goes over every edge, making them buttery smooth. This is important because with this knife most people appendix carry and a smooth edge makes bending ,moving, and even sitting in a car comfortable and making it seem it isn’t even there.

In reality if you don’t have a Boker Ridgeback you should order one or be saving your hard earned pennies to get one. My only complaint was that I had to swap the loops around for my left handed use, which honestly most of you could care less about because you’re all right handed SOB’s and laugh at us lefties, but, I digress. In the end if this article ever makes it back to Boker in Germany, I know some designers and engineers will be taken out back and shot in the head for not making the Sheath “superior” enough but hey that’s just how the Germans roll.


Manufacturer: Armadillo Concealment

Website: http://www.armordilloconcealment.com/

Price: $34.99 (+10 dollars for any other color than black)

Would I tell a Friend: F*CK YES

How to rate scotches

Glass 3So, you’re ready to start drinking scotch but aren’t sure where to start or what all these descriptions mean. Well thats what you have us for. I’ll try to break this down into a pretty easy walk through for you and hopefully simplify the steps that is scotch tasting.

Theres a lot of discussion about wether single malts or blends are better. I prefer single malts but theres nothing wrong with a blend but I’ll save that for another article.

When it comes to tasting scotch the first thing you’ll probably notice is a bunch of odd terms used to describe the drink itself. Things like peat, earth, smoke, grass, seaweed, sea air, seawater, scopes, pepper, etc…..

These would be the more common terms that are being used by people for the sake of continuity and are considered the more “accepted” terms for describing scotch, however, when you are tasting scotch make notes of what the flavors taste like to you. Afterwards compare your notes to other reviews, like the ones here, (shameless self plug) and see how the notes match up. Eventually you’ll start to see how the words you used to describe the scotch could be interchangeable with on of these other terms.

Now that the nomenclature is out of the way we’ll start the fun stuff and go over the steps on how to drink a dram.glass2

1. You’ll need to pick a glass to taste your scotch in. Most experts recommend using a tulip shaped glass since it has a wide base to release the aromas and the a narrow top to funnel those aromas out. This makes nosing the drink easy. I still prefer you basic rocks glass like the one shown above. Either way take your glass and pour yourself a dram. (By the way a dram is equal to .355ml but in most places has just become a generic term for a small amount.)

2. Hold it up and look at it’s color. Scotch can range from very light to a darker almost caramel color. This can sometimes be an indication of it’s age. Lighter is usually younger and darker is usually older but since coloring can be added this can’t be used as a definitive way of judging age. You can, however get a decent idea of age by looking at the legs of the scotch. Younger scotch tends to move quicker where older scotch tends to move more slowly. Swirl your scotch in the glass and watch how fast or how slow it creeps back down the glass.

3. Next smell it. Try to inhale deep. The first breath will probably mostly smell like alcohol but try it again and you’ll start to notice other things. Spend a fair amount of time doing this as you’ll begin to notice more and more aromas. Think of the different smells and what they remind you of.

NOTE: This is where varying opinions come in. At this point some people will add a bit of water and smell it again before tasting. I prefer to taste it once undiluted and then again diluted so that is how this will be set up.

4. Finally you get to taste it, but only a sip. Sip just enough into your mouth that it can cover your tongue and move it around to make sure it covers the whole thing. You’ll pick up different flavors on different parts so this part is pretty crucial. Think about what the flavors remind you of, again you can use any words you like and eventually the more widely used jargon will start to match yours. Also you’ll be able to determine a mouthfeel or palate weight. Mouthfeel is how heavy or light, smooth or oily the scotch tastes when your drinking it (think viscosity and texture).

5. This is where I add water. Just enough to take the more pungent alcohol smell away and I repeat the whole sampling process again. Always take note of any flavor changes you find from the undiluted tasting as well as any flavors that weren’t there before. I have always carried a small notebook with me to write down my opinions so I can remember them correctly and make notes about wether I would like to try it again or buy a bottle, I found this to be very helpful.

If you do decide to buy a bottle the best suggestion to me (which I am horrible at following) was to try to finish the bottle in about a 12 month time span from opening. Once it’s opened the alcohol will react with the oxygen and will alter the flavor. I’ve been fortunate enough that this hasn’t happened to me but I’ve heard some real horror stories.

Well that’s really all there is to it and it’s not that hard or mysterious at all if you keep to the basics. So go drink in confidence and try something you haven’t had before and see how you rate it. Feel free to leave your review of anything you have in the comments below.

Happy Drinking.